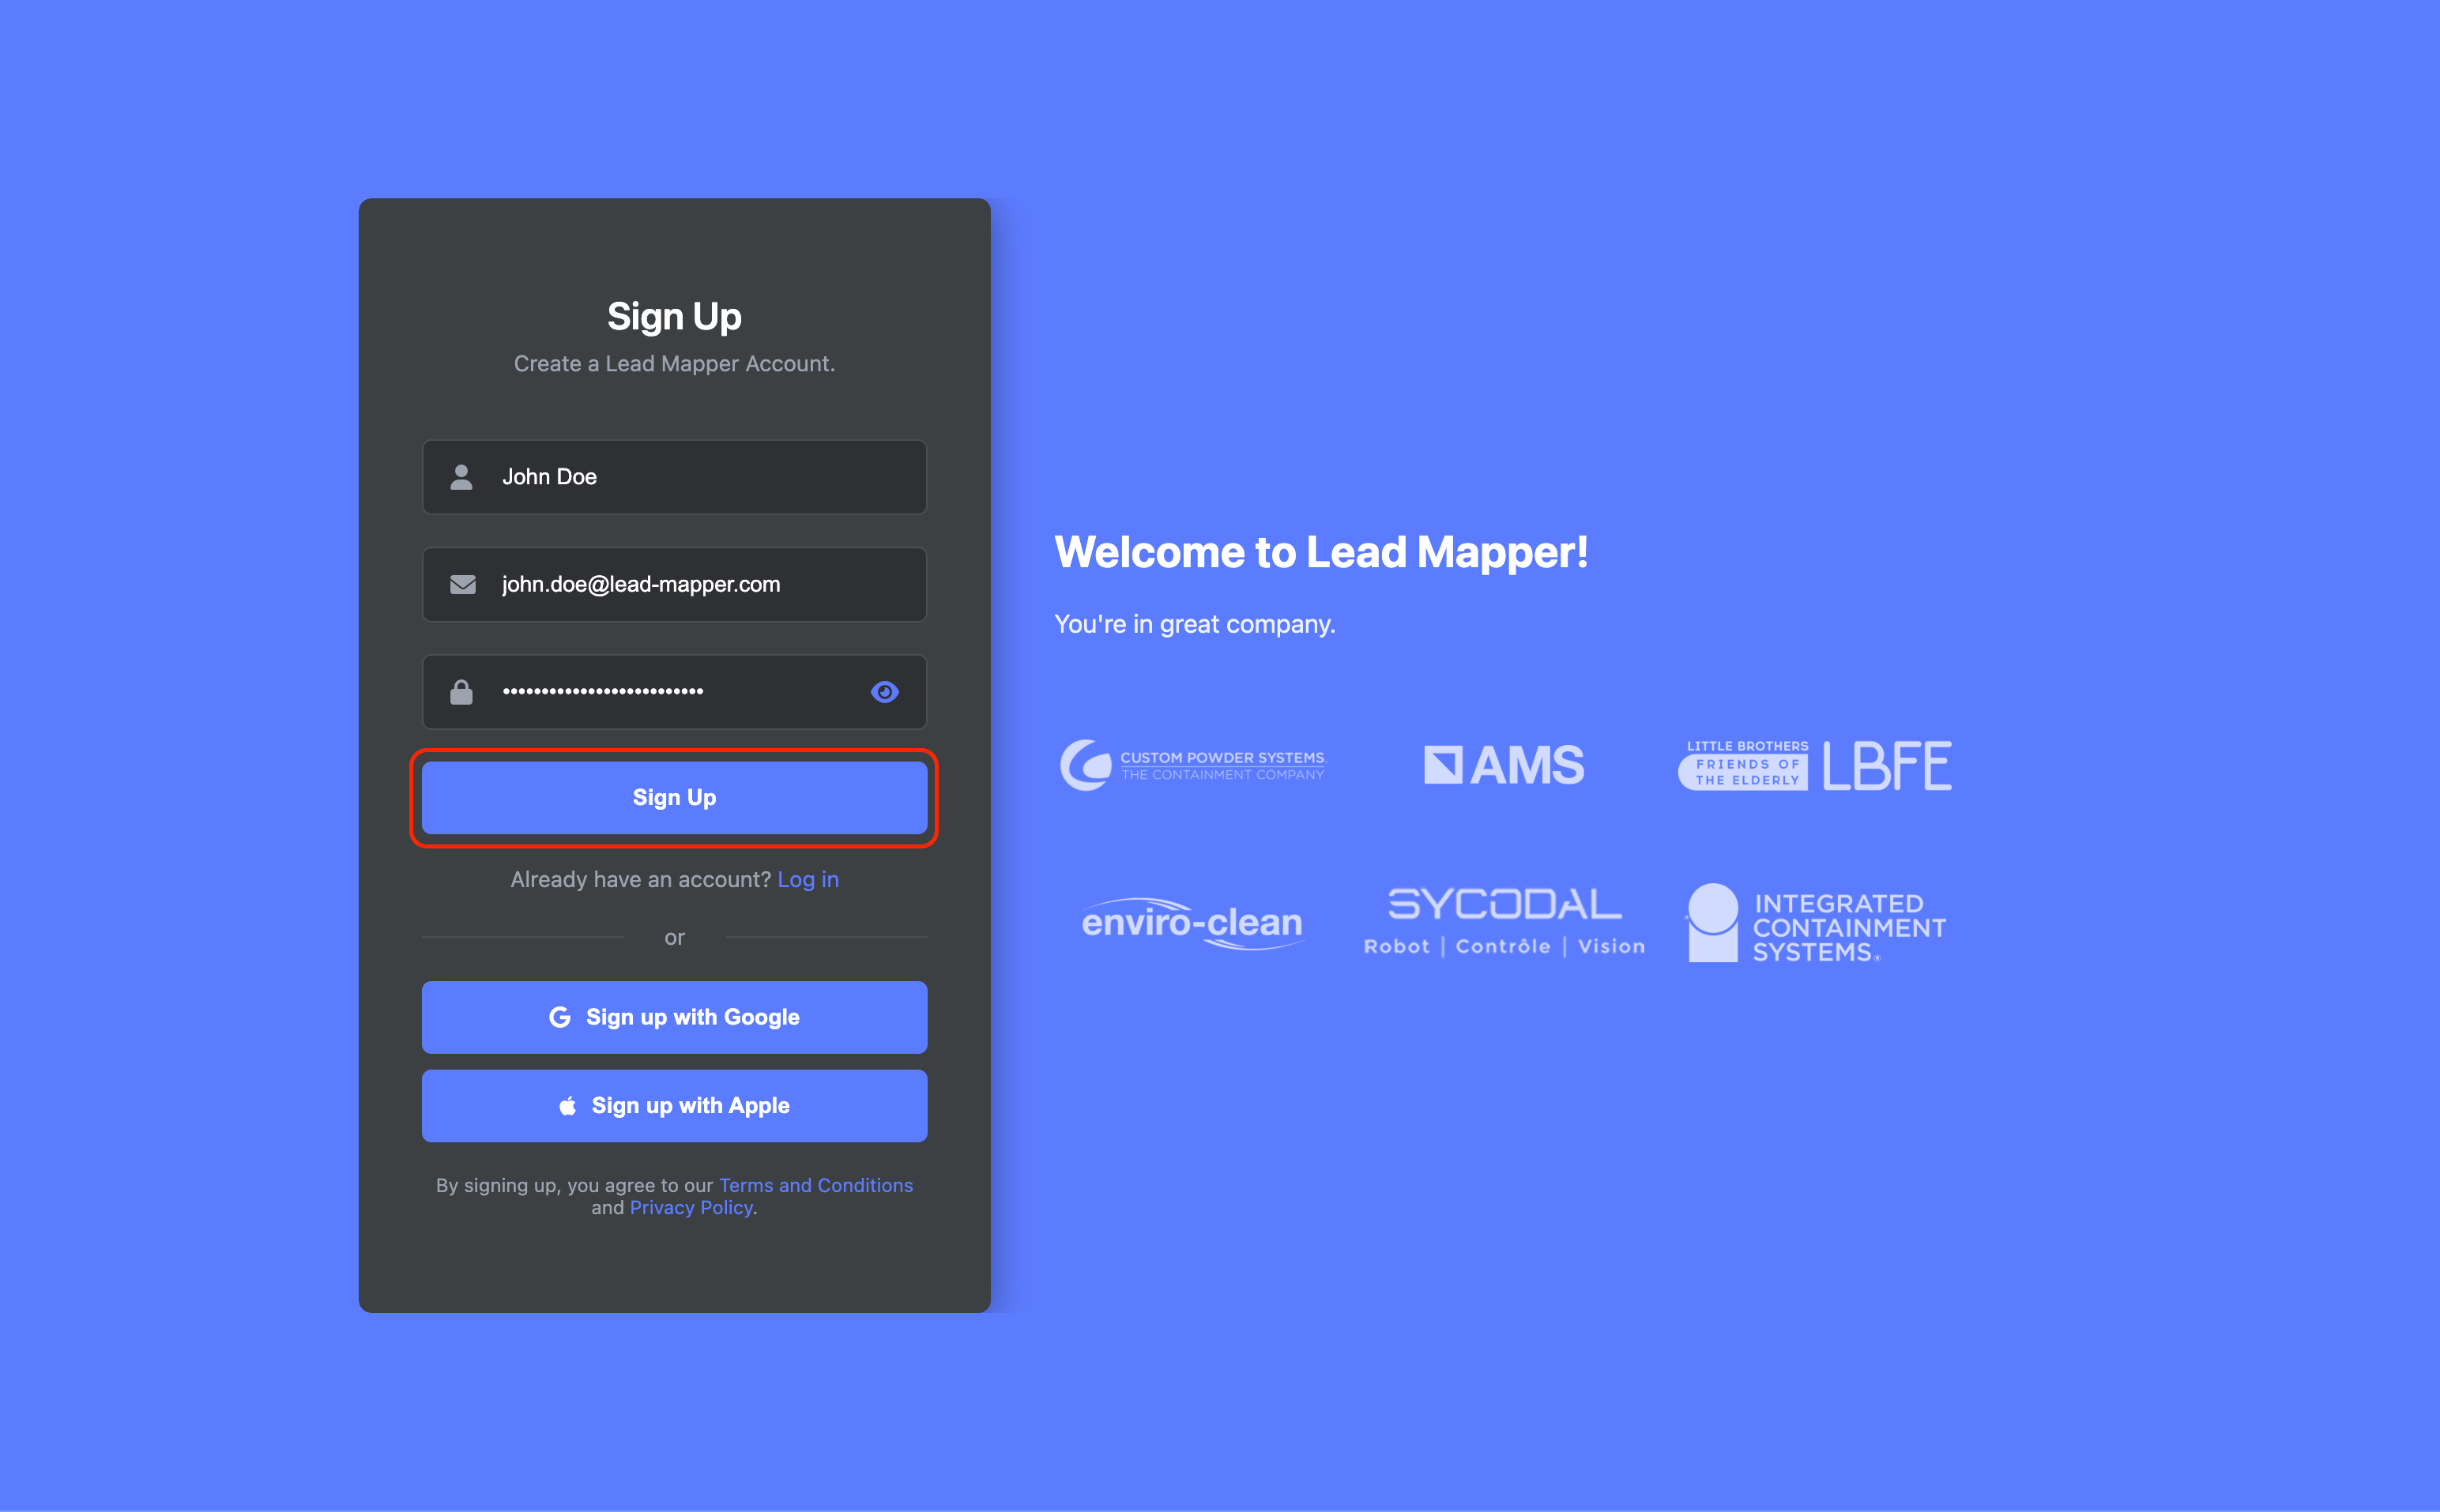
Step 1: Create a Lead Mapper Account
Start your journey by setting up a Lead Mapper account. Follow these simple steps:
Go to Lead Mapper's website, fill in your name, email address, and password, then click the "Sign Up" button to create your account.
Step 2: Connecting Lead Mapper with Less Annoying CRM
Now that you have a Lead Mapper account, let's establish a connection with Less Annoying CRM. Here's how:
Click on the "Connect" option for Less Annoying CRM.

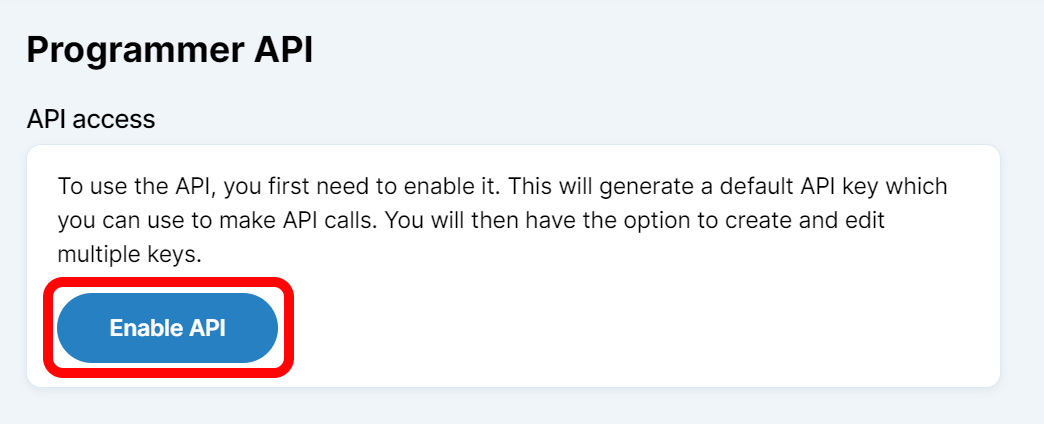
Login to your Less Annoying CRM Account, then Navigate to Settings → Programmer API.

Click on Enable API
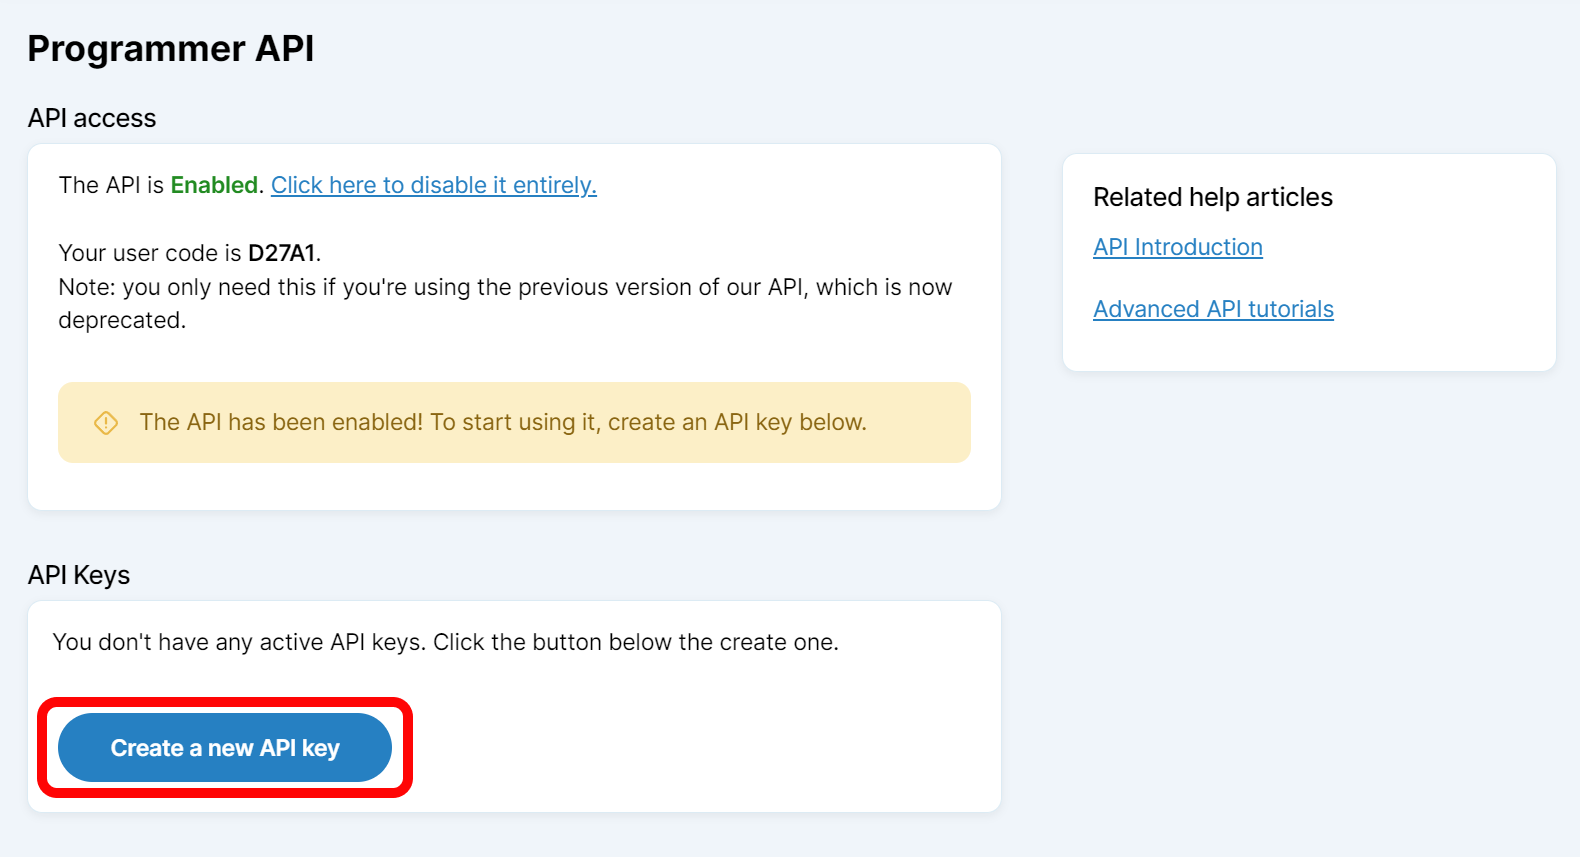
Click on Create a new API key
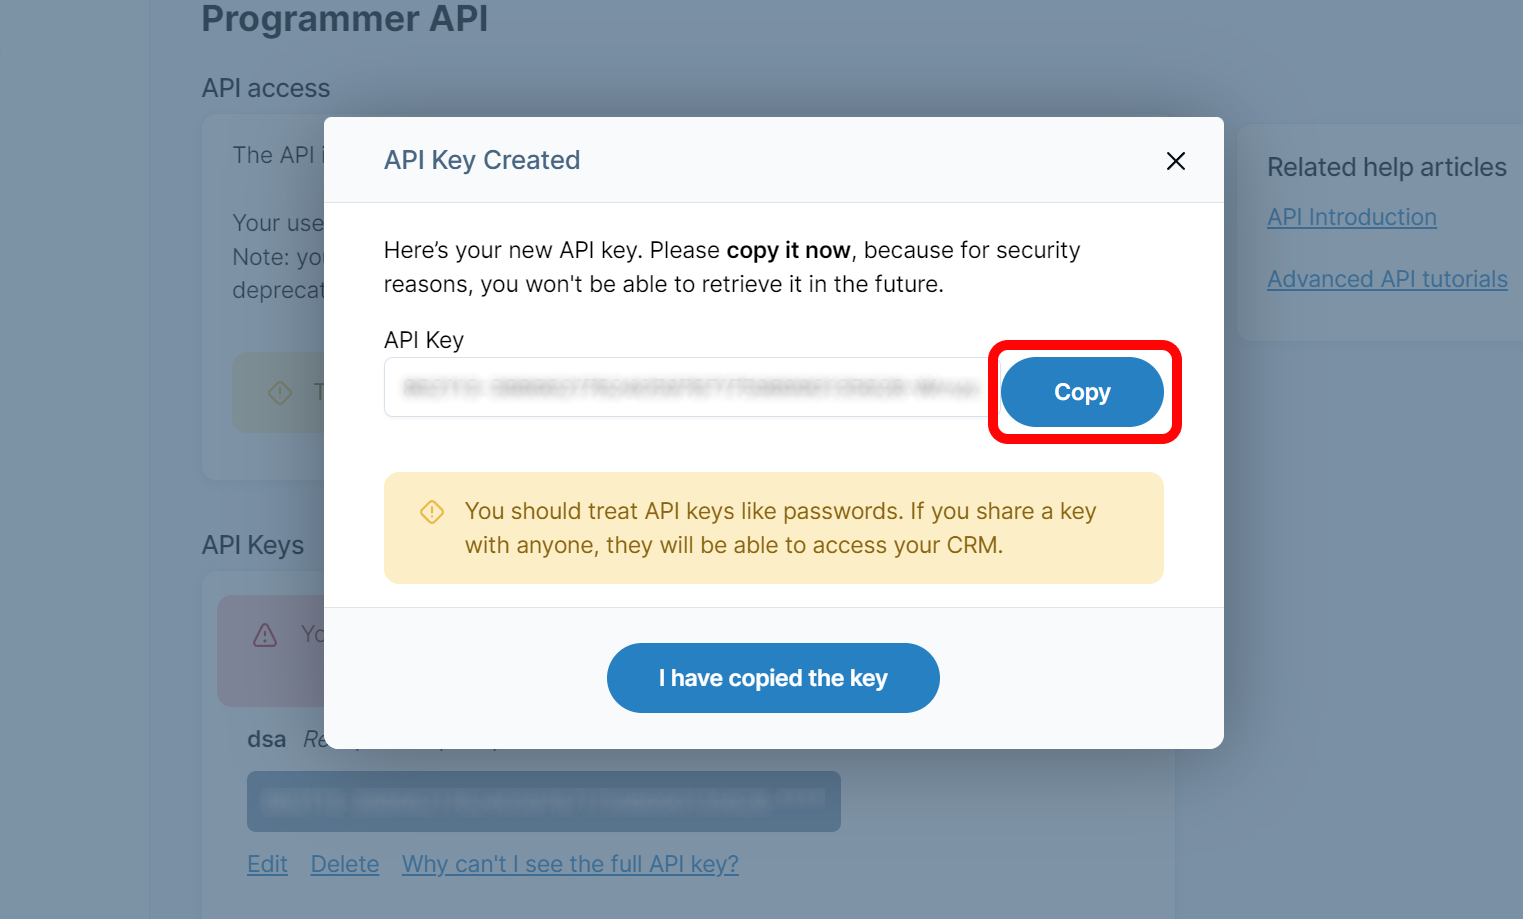
Enter a nickname and click on Create key

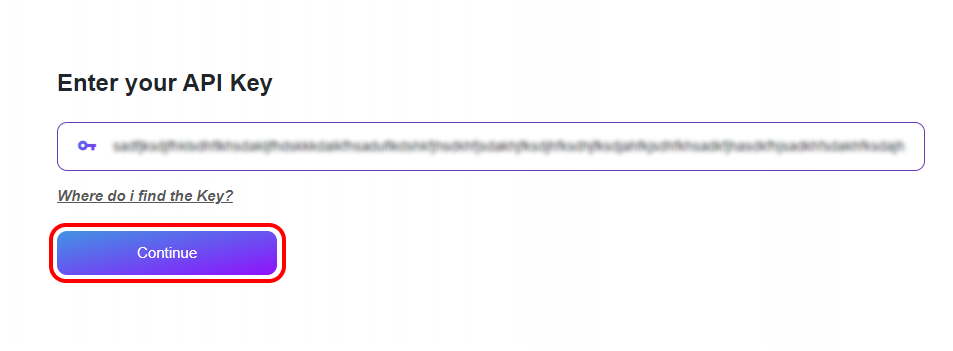
Copy your key
Navigate back to Lead Mapper and paste the key into the designated field. Then press Continue
Step 3: Wait for your account to be set up
Once you’ve successfully connected your account, Lead Mapper will begin setting up your data and establishing a real-time synchronization channel with your CRM. This data process usually takes between 5 and 30 minutes.

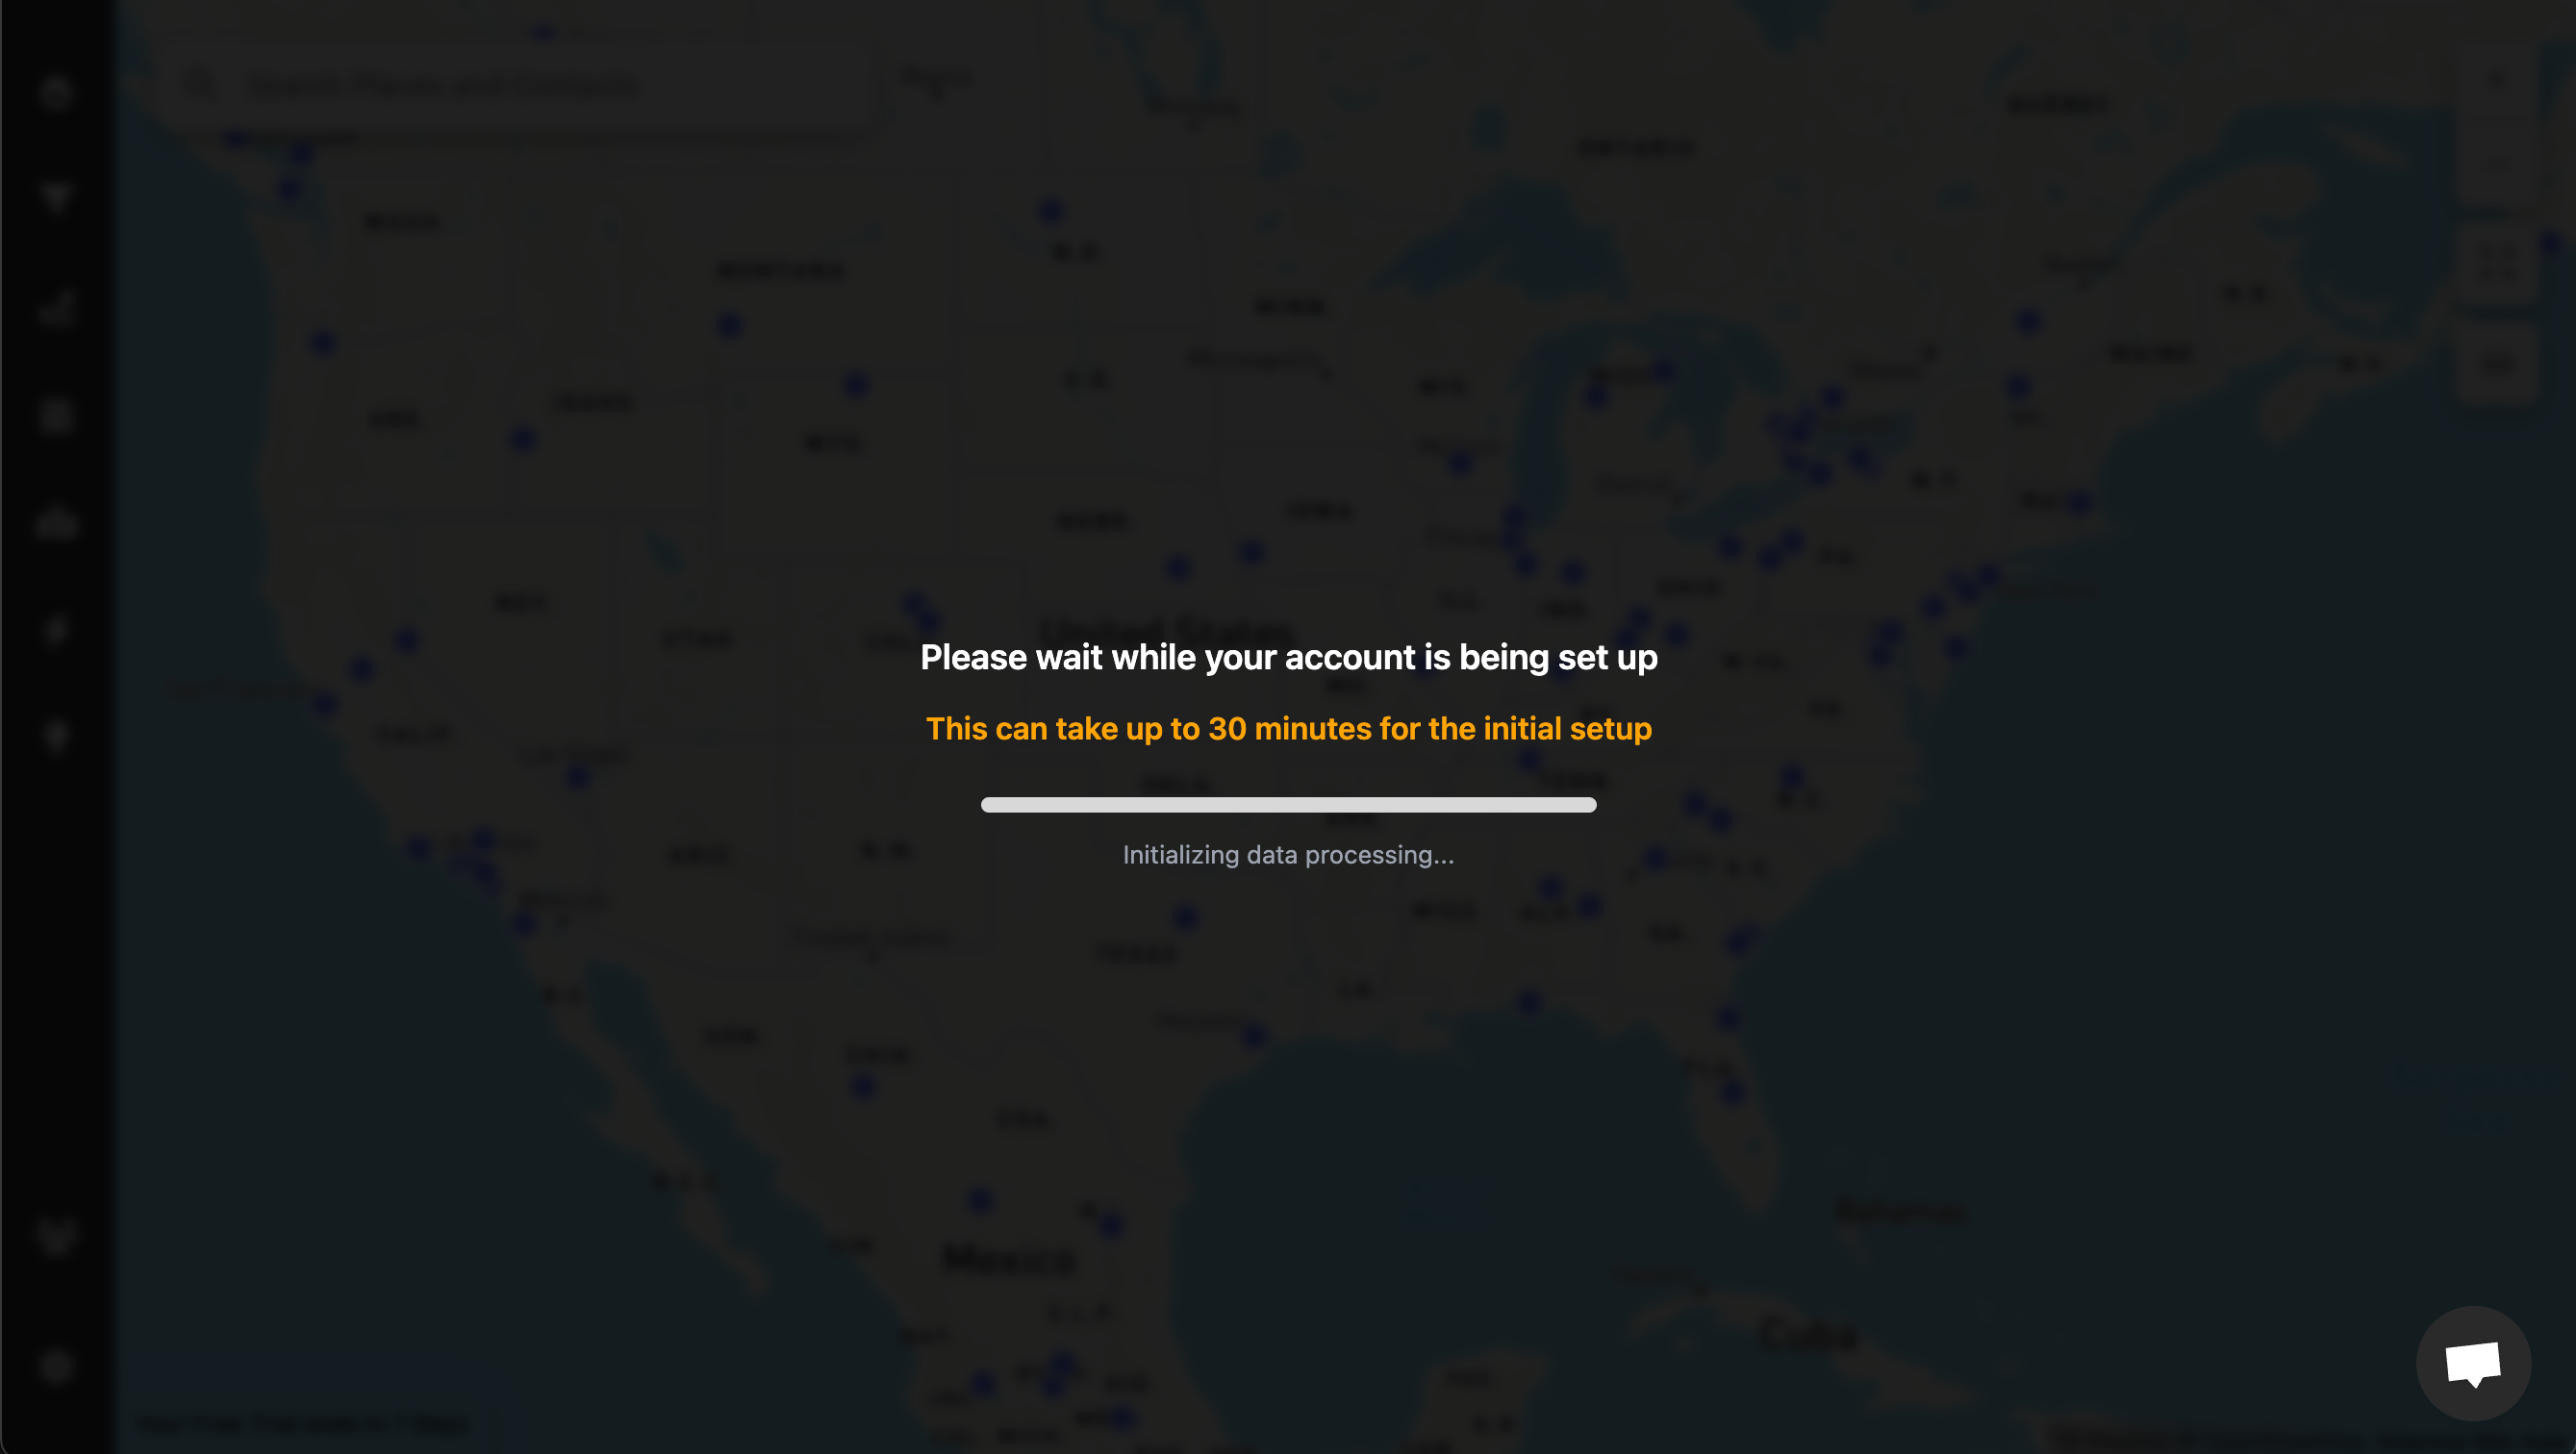
As soon as your data is loaded, you're ready to harness the power of Lead Mapper. Enjoy the experience!
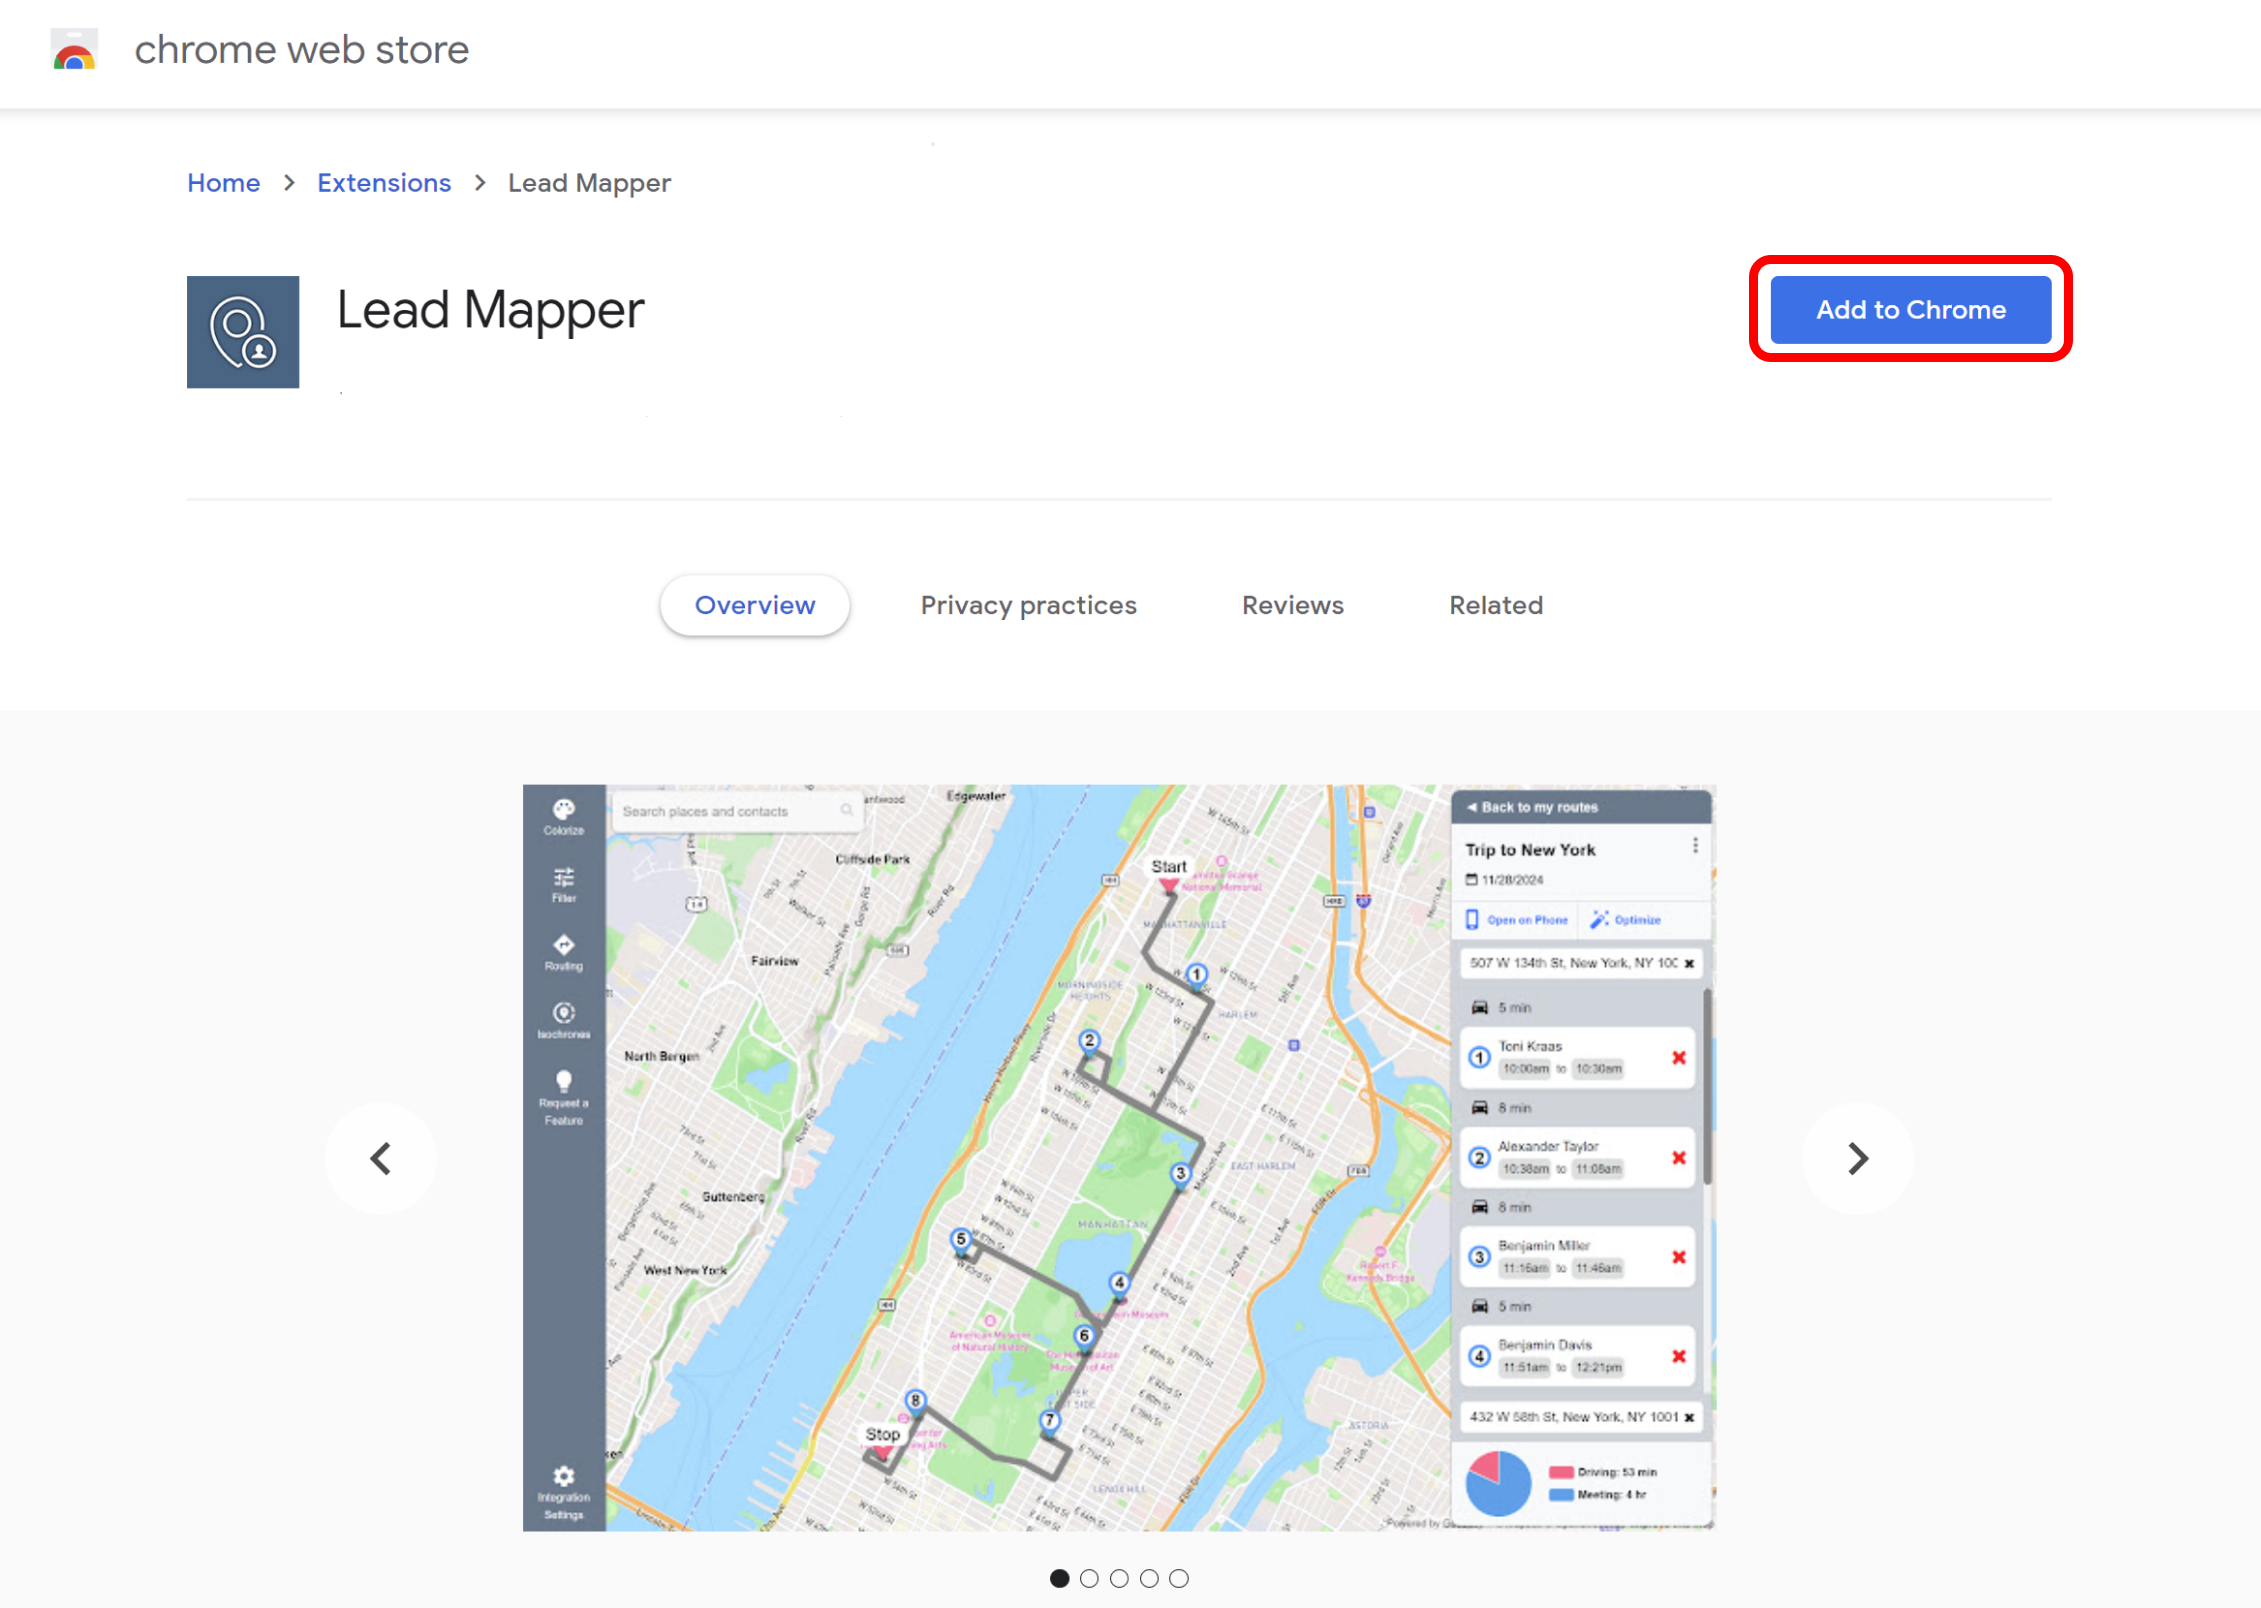
Step 4: Install the Chrome Extension
If you're a Google Chrome user and want the convenience of accessing Lead Mapper within your CRM quickly, consider installing our Chrome extension:
Go to https://chromewebstore.google.com/detail/lead-mapper/icibhpphpnnkngdobnbkpnhiggkmgnam?hl=en and click "Add to Chrome" to install the extension.
Now, go back to Less Annoying CRM and sign in. You'll notice a new section called "Map" Click on it to seamlessly integrate Lead Mapper with your CRM.
Step 5 (Optional): Install the Mobile App
To access Lead Mapper on the go, install it from the App Store or Google Play Store: